Wednesday, March 31, 2010

Are flies pollinators?

My euphorbia was abuzz today with flying bugs. There are no less than 4 winged creatures in the picture.

But only two of them look like a bee to me -- this furry faced guy here.
And this striped-back one here.
 
The rest looked like common flies or flies with blue bottoms (when the light was right.) And the flies way outnumbered the bees.


See how in the last picture, the creature that looked like a fuzzy fly revealed itself to be blue bottomed?

I looked around the web and found that flies can be pollinators at sites such as this one by the U.S. Forest Service. Apparently flies like pale, putrid, funnel-like flowers -- which would explain their attraction to my euphorbia (which doesn't really smell that bad....) And true bees have 2 sets of wings (four wings total) -- so I am thinking that at least one of my 'bees' way above is actually a bee-mimic.

And all of this and I am not sure it is going to matter for my fruits or veggies. Flies are pollinators -- but they won't likely be attracted to the bright, sweet flowers of my fruit starts, bushes, and trees. And my veggies aren't going to need pollination to deliver tasty goodness.

More importantly, I am going to have to figure out what to do to encourage my well-protected veggies to grow....

Sunday, March 28, 2010

new ornamental bed attempted

I have been looking to makeover my patio as a nice place to sit out during the summer -- hopefully while nibbling on treats harvested from our new fruit and veggie gardens.  This is what I had:
Besides being a mess, I didn't find the tall arborvitae or the overgrown, black-spotted fotinia inviting.  So we went for a full renovation.  In February I had out a tree service to remove all the offending plants.  That left us with the ability to see two yards over. 

So far, I had failed to make the area any more inviting (though the crabapple in the foreground sure is pretty when it blooms.) 

However, there is nothing I love more than a bare bed.  Starting from scratch lets me play with texture and color.  I got out to my local store on Friday (without kids) and picked out a bunch of bunch of low-maintenance plants.  First I selected a narrow clumping bamboo, borinda angustissima, to provide height and shelter.  It grows to about 15 feet in the Pacific NW and stays to about 2 feet around.  It has narrow leaves and a vase-shape that should provide a delicate screen as it matures.  I am in love with the darn things. 

Then I compared the bamboos to a bunch of possible ground covers (mostly grasses) to see if they would match.  In the end, I chose "June" hostas, "Ice Dance" carex, Japanese forest grass, and a "Tom Thumb" phormium to fill in the gaps at the foot of the bamboos.  The phormium is the only plant that might need some coddling past the initial first year or two of regular watering.  But look at this little detail it brings to the garden....  I had to have it!
On Saturday I set out to get my plants into the ground and ran into a disaster -- the worst rootbound-ness I have seen in purchased plants.  I even had to cut one of the pots to get the plant out of it.
I am so in love with this bamboo that I want to make it work -- but so far have failed to find good advice to help me.  I tried picking at the roots, I tried soaking them in water ...
Nothing worked.  Normally I would cut the roots with a box cutter -- but one of the bamboo's roots spiraled around horizonally so I risk shrinking the roots to mere inches and I am at a loss as to what to do.  So for now I am waiting for the bamboo specialist to return to the nursery.  I am hoping for definitive advice.  I really want these plants to flourish since they will shade me while I munch berries and tomatoes later this summer. 

What do you do in the face of excessive rootboundness?

Wednesday, March 24, 2010

Tuesday, March 23, 2010

sprouting contest winner ...

Tigger melons.  Although I am sure that the watermelons, peppers, and basil will catch up soon, I only took the melon sprouts out from under the dome.  Who wants to encourage fuzz?!

But then I had to figure out what to do with them.  I was wondering if the great distance between my lamp and my sprouts hindered the growth of my last sprouting effort -- and since I really want these to be lush transplants in May and June, I decided to improvise a bit.  I am now using a cardboard box to lift my sprouts to the light.  I can cut the box down to give them space as they grow.  My solution won't be as earth-friendly as using (and reusing) a chain to raise and lower the lights appropriately -- but at least I am repurposing a box.

seed starts, round two

As I mentioned before, my original seeds starts did okay -- but my guess is a 1/3 or more will never make it to ground.  Yet I remain undaunted.  Yesterday my kindergartner was home on a school holiday and we started our second round of seeds in Burpee Eco-Friendly starter kits.
Last time I planted what I should have sowed into the ground (but couldn't because my raised bed wasn't built yet.)  This time we are planning ahead for starts that will go into the ground in May (tigger melons, sweet basil, sugar baby watermelons, and moon & stars watermelon) and in June (fish and anaheim peppers.) 
Last time I put the pellets straight into the ground.  This time I am thinking that I will have to "pot-up" so the seedlings get some size before they go to ground.  But first we get to wait and see what sprouts first....

Sunday, March 21, 2010

things looking good in the square foot garden

Well, the weekend is over.  We got more sun than expected and now its time to think of dinner and get ready for the week.  Just a few clean-up tasks left.
It seems that all the plants that I planted yesterday are doing well under their hoop frame/remay cover.  The plants look perky and ready to grow.  It is one of those moments of small success that makes things good.
I am really curious to see where things will go from here.  The regional veggie guru Steve Solomon recommends widely-space, dry gardening for the Pacific Northwest.  And I am really intrigued.  But on 0.17 acres in the suburbs, I feel the need for my little farm plot to look more landscaped.  So here I am on a square foot garden adventure.  Can these dense plantings really not just grow but thrive?  Will all this effort reward us with food we like to eat?  The Osaka Purple Mustard should be the first to answer, baby greens in 20 days....

Saturday, March 20, 2010

a good day to buy and plant

Turns out gardeners are not desperate brides.  This morning I headed off to the the Seattle Tilth plant sale with my son.  We got there a few minutes before opening: me towing him in the wagon.  The line was long but there were still 9 am (opening) bracelets available.  Everyone was very friendly.  And my growing boy wanted to start his adventure with a snack.  So the first place we stopped was the Patty Pan Grill booth for a quesadilla.
Once we took care of my son's hunger, we managed to find most of what we were looking for.  As the wagon began to fill, D took over dragging it around himself.  He did a great job -- expertly navigating the crowds while I moved back and forth hunting down our next picks. 

Ok. Maybe not so much.  He is only four.  A few people were bumped and apologies were offered.  Gardeners are very nice people.  
 
We brought our picks home and I started to set them out while D took a nap.  I hope transplanting is not rocket science.  I tried to treat everything gently -- but I was pretty quick about it.  In the end I imagine time will tell -- we will see what is still thriving next weekend.  I hope it all does.  Today I put fennel, rainbow chard, some flowers, two types of cabbage, bull's blood beets, choy sum, and osaka purple mustard into the ground.  The last two are things I have never tried in my life but sound tasty -- so I really hope this experiment works.

My final garden task of the day was to tuck the plants in for the night -- which I did with some remay and clamps.  I hope everything is still looking good in the morning.

Wednesday, March 17, 2010

should I be intimidated by a plant sale?

Seattle Tilth just sent out an e-mail about their cool weather plant sale coming up this Saturday -- and quite honestly, it sounds a bit like a David's Bridal $99 wedding gown sales event.  There is a pre-sale on Friday night for best selection if you are willing to pay $25 -- and the day of you can pick up a color-coded wristband to secure your 'time of entry' starting an hour before they open.  Oh dear.  Will there be jockeying?  Will there be plant grabbing and trading in the aisles?  Do you need to camp out the night before to get a good colored bracelet?  If you show up 'sometime in the morning' will there be bracelets and plants left?

I know this is silly but the idea of crowds in need of taming brings out the scaredy side of me.  Still, my efforts at seed propagation have been mediocre at best.  Only my peas seem to be flourishing (and that despite the fact that I left them outside under the cold frame last night ... it was above freezing and nothing seems to be dying so I am leaving them out tonight too.)  I figure I am going to have to suck it up, conquer my fears of the unknown, and try out the plant sale if I am going to produce something edible this spring.

Rough and tumble gardeners?  So far everyone I have met has been real nice....

Sunday, March 14, 2010

Mother and daughter day

I spent a fun afternoon with my kindergartner in the garden today.  Together we put on a number of finishing touches to our raised veggie bed.  Our first task was to mark off squares for our square foot garden.  I decided to use ground stakes to do this since they were precut and in the lengths I needed.
To get the job done, we laid down two tape measurers and used 2x2 as a guideline to put our 2 foot stakes down.  Here is my daughter making sure things will line up.
Lately she has been really interested in becoming a scientist so she had a great time being technical and exact with her measurements.
After we placed the stakes, we set them into the dirt on their edges to make them more stable.
Afterwards, we placed two 1 foot long stakes perpendicularly to make our one foot square boxes.
Finally, we cut 1/2 inch PVC to length to make hoops for our bed -- my daughter even used the saw herself!  Then we put them in place and added the clamps we will use to hold down our cloth once the plants are in. 

And we were done.  The project turned out much better than my free-standing cold frame -- and my daughter was very pleased with her contribution (and so was I!)  Now we can't wait to plant....

improvements don't really improve the cold frame

I repaired my cold frame today.  The lathe I used was too flimsy to do the job well.  The frame threatened to blow away in the wind, it got bent out of shape by its own weight, and the plastic detached in one corner.
So I attached some 2x2 cedar to the frame to add heft and stiffen it up.  My patch worked but I really must say this turned out to be an ugly project.  It looks real cheap and rushed.  Next time I start a new project, I will slow down and find out how others went about it before I get started. 
Nonetheless, I did learn something from my efforts -- if you want to protect something, what you build must be substantial.  Lathe is not substantial -- use 2x2 or other sturdy-sized wood instead.

Saturday, March 13, 2010

flimsy cold frame

Today I made a lightweight cold frame to use as I harden off my transplants.  It was really easy to make but turned out rather flimsy.  So here is what I did and at the end I will tell you what I am going to do to fix it.

Necessary supplies: 4 foot lathe, metal fasteners, a square, a hammer, 3.5 millimeter plastic, scissors, and a stapler.  So I used a square to make sure my angles were good before pounding the fastener in with a hammer. 
Here is what the fasteners looked like before and after.  The fasteners were rather sharp but I found them easy to work with even with kids around.
Then I cut off the amount of plastic I needed from my roll.  And attached it using a stapler -- I have a heavy duty stapler somewhere but couldn't figure out where it was when the time came so my desk stapler had to do.
I think this modest cold frame will be enough to keep my transplants protected while they harden off.
But my cold frame is a little flimsy.  The wind threatened to take it away so I put a chair in front of it for the time being.  When I get a chance next week I am going to buy some 2x2 and attach it to my frame for greater stability and heft.  I don't think a mild wind will down it then.
Still, I am wondering if at this point if it would be more time efficient to just try direct seeding into the ground.

Friday, March 12, 2010

Thursday, March 11, 2010

Bug Identification: friend or foe?

So I found a couple bugs in my yard over the weekend -- and since all my bug knowlege is limited to the generic: bee, worm, beetle, ant, butterfly, slug, I took pictures and sent them off to Seattle Tilth for identification.  My first mystery companion?  (Click picture for a closer look.)
A millipede.  A gardner's friend.  These little guys are a slow-moving decomposers of organic matter such as leaves. They tend to roll up into a spiral when scared -- perhaps that should have tipped me off to its essentially good nature.

My second mystery companion? (Click picture for a closer look.)
A wireworm.  A gardner's foe.  This little guy tends to live in soils that recently held sod -- which makes sense since I first spotted these quick creatures when I was removing grass for my epimediums.  If I only knew what I was seeing then, I would have dispatched of them.  Instead I left them to their own devices.  As adults they are harmless click beetles.  However as young wireworms, they like to eat seeds, stems, and roots -- not good news for a veggie gardner.  And the worse news is that they stay in their larval wireworm stage for two to six years before becoming adults.  For more information you should check out this University of Maine Cooperative Extension fact sheet that Seattle Tilth shared with me. 

Perhaps is was wireworms that did this to my tyfon (turnip.) 
Since my epimediums have been slower to emerge than expected, I am going to try a technique that Seattle Tilth said might be helpful -- leave some decoy carrots in the bed to lure the wireworms from the new starts.  If I have nibbles in a week I will know that I have a problem.

Sunday, March 7, 2010

The raised bed is ready to plant

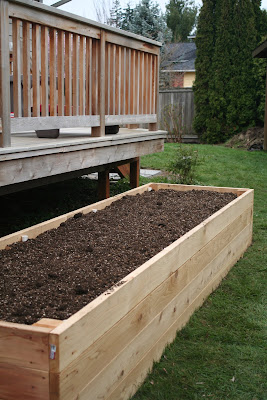
Well, the weather turned from short-sleeves to sweatshirts and hats overnight -- dampening our gardening enthusiasm.  Nonetheless, we managed to finally fill our large raised bed with our best approximation of Mel's mix (basically a self-mixed potting soil made of multiple composts, peat moss and vermiculite.)  The mix made sense to me since my raised bed is basically a very large container.
The light and fluffy mix is begging to be planted.  So I am probably lucky that the weather changed so quickly or I might have turned my tender veggie sprouts out too soon.  I will have to read up on this but I think the plants can go out once they have true leaves and/or their roots break through the pellets. 

I imagine it would be be best if I harden, or leave the pellets outside protected, for a day or two before I plant them out in the soil.  To help me harden my pellets, I am thinking of building a small square frame and covering it with a heavy, clear(ish) plastic sheet -- kind of like a smaller version of My Tiny Plot's peach frame -- so I am ready when the time comes.

In the end I am happy that the weather has bought me a chance to regroup.  And I am also pleased that the colder weather is bringing rain.  I am sure my new strawberries will appreciate it since I am a lazy waterer (my soaker hose still isn't attached to the faucet!)  

Saturday, March 6, 2010

PM project: the fruit bed

This afternoon I turned my attention to our fruit bed.  I had already laid down the soaker hose so I pulled the strawberry starts from my fridge.  I was having a hard time visualizing 50 strawberry plants one foot apart, so I snagged 50 toothpicks from my baking supplies and spread them around to help me with my spacing.
I left the hairy mess of starts out on a plate between damp paper towels since it was short-sleeve weather and I didn't want the roots to dry out. 
Raintree Nursery (where I got them) says that strawberries are very flexible: they can be planted in mounds, beds, rows, containers, etc. -- but their root tips should be straight.   Now the rest of what I show you I might have gotten wrong.  I am NOT an expert.  I did what seemed right for me -- it may or may not be right, it may or may not be right for you. 

Disclaimer complete, I will now share my process: when I planted my starts I would flip the berries upside down and open up their root skirts.
Then I would place them in a prepared hole.  I prepared the holes by shoveling out a spadeful of dirt, then crumbling most of the dirt back in careful to be gentle with the worms.  Then I would shape the crumbled dirt in the hole into a mound that was essentially soil level high before setting the strawberry start on top so its skirt would fan out.
Then I would cover the roots with the remaining soil.  If you look around you can find a lot of pictures like this one from Ask The Berry Man that give a visual of the level at which the crown should be planted.  I hope I got it right. 
For the most part though I didn't worry much about planting my strawberries because I knew that the area would be covered with compost later this afternoon -- and that made me feel like I had backup.  So by day's end, with the help of a neighborhood teenager who hauled all the compost, my fruit bed looked like this.
I can't wait to see what it looks like this summer!  But for now, with an achy back and a mild fever, it is time to get myself to bed so I can recuperate for tomorrow.

AM project: removing tyfon cover crop

It was a busy day at Scaredy Cat farm.  This morning I laid down a soaker hose for my fruit bed then started the transformation of my  "weed bed."  The first task was to remove all the tyfon cover crop I planted there last fall.  Previously the bed had been covered with landscape fabric and beauty bark.  I picked tyfon as my renovation crop because it has long tap roots to break up soil and it is edible (though I wasn't brave enough to try more than a few leaves.  The bottoms are supposed to be like turnips but something seemed to have gotten to mine first -- see this January post.)
There was a lot of work to do so I enlisted all the help I could get. 
And while this looks like lots of work, it wasn't.  What started as an Indiana Jones adventure morphed into the German Army, into being farmers, into a fourth of July celebration, into pirates. (Tyfon is that easy to pull.)
The kids and their neighborhood friends did a great job.  As you can see, they razed the lot before losing interest.
Which left me with just the devastation to deal with. Unfortunately, despite the tyfon I still had a thick mat of weeds.  I started to remove them -- first individually to make sure the really bad weeds were dealt with appropriately, then with a hoe to mow down all the annuals. 
I still have work ahead of me (more hoeing and covering the area with compost), but with any luck this bed will get seeded for wildflowers as a draw for beneficial insects tomorrow.